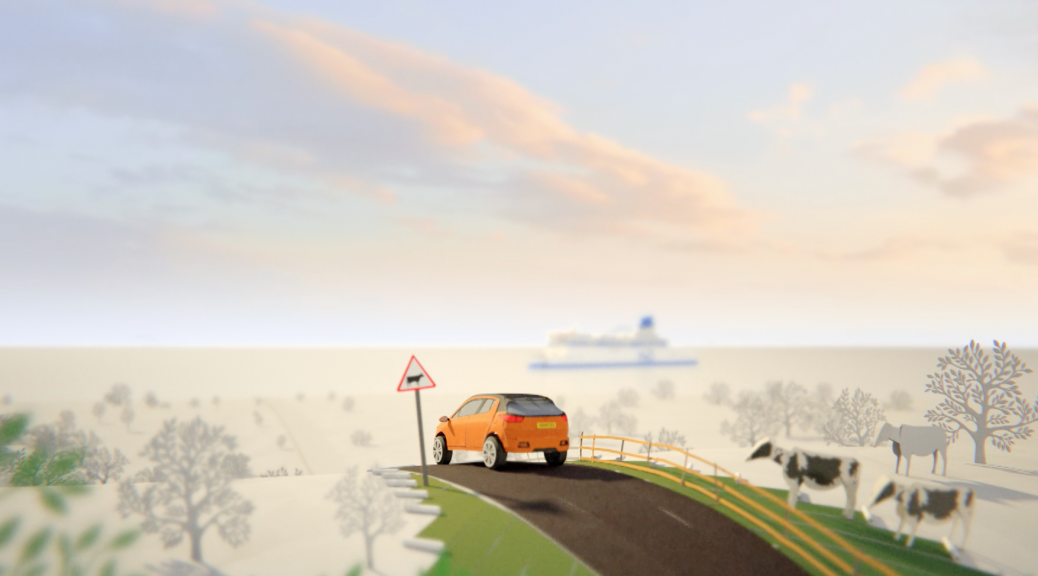
My last project before Christmas was at Seed Animation, somewhere I’d begun the year working on the surreal and hilarious Halwani Chicken commercial. This time around I was doing similar work on a P&O commercial, the style of which was to match a genuine stop-motion animation. As the client wished to see colour progressively spread through the world of our travelling couple, the choice to do this advert in 3d was made.
My input was as a layout guy and TD type. Layout is essentially placing things on screen in such a way that the eye feels comfortable when looking at the shots and is led to the correct area of interest. The TD (Technical Direction) input was mainly the unrolling paper effects seen throughout the animation.
Each strip of rolling paper was actually one long grid, flat by default, with a controller null at one end. A spiral curve was parented to that null and the grid deformed by that curve. As the null moved the spiral along the grid, an expression offset the position of the grid so it stayed put and the end unrolled. The grid was then extruded to give it thickness in its unrolled position, the new polygons kept in a separate cluster so they remained white, giving the impression of cut paper. As the operator stack remained live, the whole thing could be rolled back up, placed to suit the layout, then unrolled and deformed by a lattice to hug the surface it’s sat on. Having been animated, the whole thing was then converted to 2s so it mimicked the stop-motion 12fps standard.
Other inputs from me included the wobbly sellophane-like wake at the bottom of the ferry and the stones building up the castle in the background.
As with the Halwani commercial earlier in 2016, the whole project was rendered using Redshift 3D out of Softimage. Render times from Redshift still blow me away. It’s such a boon for small studios.
After assisting on a PS4 ad, tweaking a few shots to help another 3D guy with his workload, I moved onto this advert for Swisscom.
Layout is a stage that many of us do as part of shot creation. It’s similar to photographic composition in that elements in a scene must fit together on screen to draw the viewers’ attention to the right things, give scale to a shot, or perhaps a sense of drama or relaxation. In this case the skiier has to look fast so the piste has to be described on the mountainside in a way that suggests quick downhill progress in each shot.
We placed lots of fences in such a way that when someone else came along with a working system for simulating the wobble of said fences they were already there and the layout wouldn’t have to be worked on. This is almost always wrong as the layout tends to be adjusted according to client’s needs. For example if they feel the background isn’t working, perhaps the matte painting will need changing and the piste now runs into a mountainside. Looking at the final cut for the first time recently made me notice this had indeed happened and the fences had been adjusted accordingly.
All in all the piste appears consistent in width and our skiier makes it down to the finish line in double quick time!
To me this is quite a clever little advert, something that Glassworks seem to specialise in.
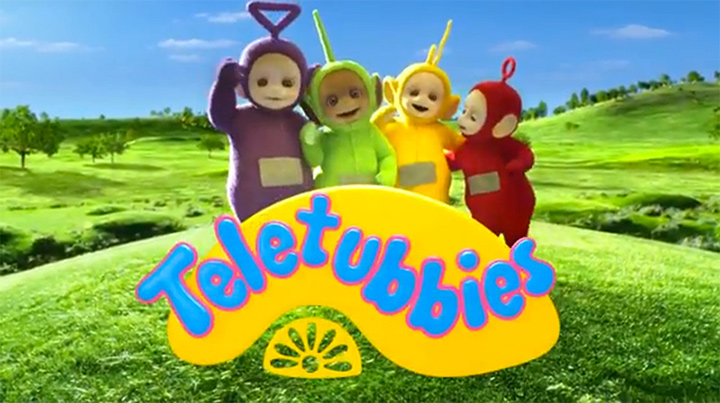
From the summer of 2014 through till the summer of 2015 I was involved in a project the scale of which I’d not played a part in before. A new series of Teletubbies was announced as being in the works, and Lola Post, where I was freelancing as a 3D type, had won the contract for all the VFX. All 60 episodes of it.
This amounted to hundreds of shots, a volume which is ordinarily associated with film projects. Initially I was involved in the pre-production, working alongside Pinewood-based prop-makers Propshop and the production company, Darrall MacQueen, in laying out designs for the set and other VFX assets. The actors were to be shot on a blue screen with the set being a 1:20 scale. It was our digital set layout which was 3D printed and then dressed by the prop shop staff. This allowed us to use the same 3D data when lining shots up in postproduction.
During the shoot I was working out of a hair and make-up room next to stage three at Twickenham Studios, alongside the DIT. This allowed me to continue developing assets for the 3D team back in London, while still being available on set for questions about set extensions, digital assets and so on.
Once the team on set were up to speed and questions of a 3D nature were thin on the ground I returned back to Lola Post in Fitzrovia. There we had set up a dedicated office and team specifically for the Teletubbies. My main responsibility there was to be lead 3D TD. However I was not the only one. Tiddlytubbies had become such a large part of the show that they had their own section, led by Jonny Grew and Josh George, with much of the animation by Steve White.
In the meantime, I had become what the supervisor, Garret Honn had described as ‘chief landscape gardener’. Every external shot has a set extension. The real scale model is only 4 metres across, representing an 80 metre circle in Teletubbyland. I had come up with a set extension system which was refined as the project went on, but allowed a few of us to continually churn through the many moving or high angle shots that required distant hills, grass, clumps of flowers and trees to be seen beyond the edge of the model set. For many shots which were lower or nowhere near the edge of the set, we got away with putting a large panoramic image in the background and sliding it around from shot to shot.
For the sake of generating distant hills with realistic lighting and so on, we’d gone down the route of using Terragen, a software I’ve used many times for external landscapes. However, with its relatively slow render times, it was only truly used for the opening and closing credits where the light swings round, creating raking shadows. The rest of the time, the background is a large cyclorama, rather akin to a zoetrope, constructed out of Terragen renders. This approach kept render times down, something that was very important with such a volume of material to get through.
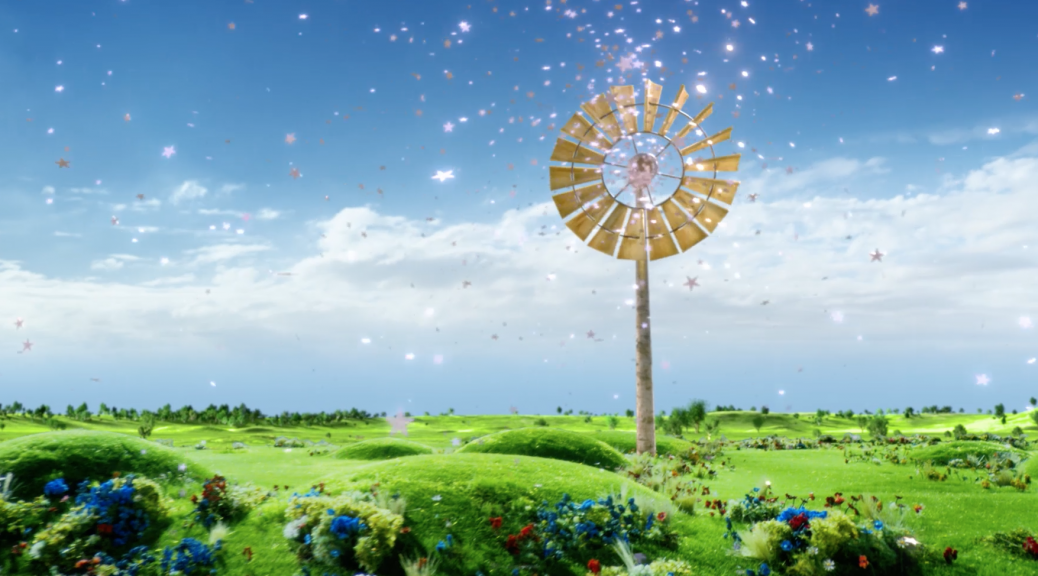
Naturally enough, Teletubbyland needs more than just grass and hills, so there are trees, flowers, many tufts of grass and so on. The trees are based on illustrations created by an independent illustrator, brought to life through a combination of softwares; Speedtree, Mudbox and ultimately Softimage. Additionally, we created flowers based on the scale models from Propshop, alongside the stunt ball for Laa Laa, custard bubbles, snowballs and other non-spherical assets, such as the windmill. Naturally there was toast. Custard and toast. No wonder this bunch are funny colours.
Once the project had truly gotten underway I spent roughly half my time answering questions, watching dailies, attending meetings and keeping an eye on the render farm. In that regard it was the most technical role I’ve undertaken. The rest of the time was spent tracking shots, managing who did what and occasionally doing shots myself. Props to the rest of the 3D team for their untiring efforts, especially Olly Nash and Ismini Sigala who were both in it for the long haul. Between us and Tammy Smith we’ve tracked more than enough shots for a lifetime, animated many flowers and a lot of spherical objects.
Naturally, there’s more to life than the 3D side of VFX. The 2D side was phenomenal in scale. So many blue screen shots, so little time. It all needed keying, roto work, cleanup and the final compositing too. To list everyone here would be crazy and considering only a handful of people will read down to this paragraph, i’m not going to list them all! Just be aware that for every shot on Teletubbies that you watch with your kids, about 5 people will have touched it and most of those will be compositors and roto artists. Thanks to all involved. Your efforts did not go unnoticed!
Teletubbies is currently on air in the UK and is bound to be shown elsewhere soon. Response seems to be positive so far. Due to very strict licensing agreements I can’t currently post videos from the show here, so it’s over to the BBC with you!
Recently I’ve been retraining in Maya and giving myself extra alone time with the Arnold renderer from Solid Angle.
I decided to use this as not only an opportunity to find out how my Softimage lighting and rendering skills translate to Maya, but to show how basic compositing is something that every 3d artist should embrace if they don’t already.
One thing which has surprised me again and again is how little students and graduates of 3d courses are given a grounding in understanding what goes into their image and why it’s beneficial to use the compositing process as part of their workflow. Some students are even penalised for not showing their raw unenhanced render, having points deducted for daring to composite. To give a parallel, this to me is like a film photography student handing in negatives and no prints. The job is half done.
This won’t be a tutorial, more a pointer in the right direction for those who are starting out.
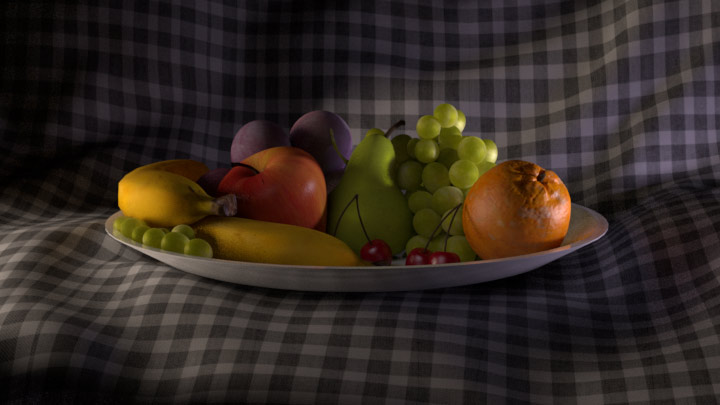
The example I use, a still life of a bowl of fruit, is a model from the very first lighting challenge hosted over at CGTalk. The files and others are downloadable at 3dRender. The model’s pretty old now so it’s not especially high detail but is still sufficient to show you what I intend to.
After a bit of setup in Maya and throwing on some pretty rough textures, here’s the beauty straight out of Arnold:
It’s lit with 3 lights; A cool exterior light, a warmer interior light, and a fill for the shadow in the middle. On their own, the images appear like this:
These images can be added together in any compositing software and they will give exactly the same result as the beauty above, to the extent that a pixel on the beauty will be exactly the same colour as when these three images are added together.
Each of these images is itself a composite image. Arnold, Mental Ray, Vray and other renderers consider many different material properties when returning the final colour for a particular pixel. Each property can be saved out as an image itself and added together to form the final image. In the case of the beauty itself, these are the images that I’ve rendered out of Arnold:
Again, added together, these form the same image as the beauty above perfectly.
(A side note here: A few component images are missing, including reflections, but were missed out of this contact sheet as they are entirely black. As none of the materials are reflective in the traditional sense, the reflection image is returned as black, whereas the direct specular contains highlights that mimic reflections. Arnold is peculiar in that it can consider reflections in 2 ways and transparency in 2 ways, depending on what is trying to be achieved.)
So what am I getting at here?
Here’s the beauty again:
Now here is a warm, evening setup:
And finally, a night lighting setup:
All three use the same component images, composited together in different ways: For example, tinting the lights, changing the intensity by blending the images with varying opacity, or even desaturating the key light to achieve a moonlit interior effect. On the night lighting I’ve changed the apple using a matte together with the specular & sss channels from the fill light. It was too bright and waxy. I could have re-rendered the 3d perhaps, but a tweak in Nuke was a lot more efficient.
The compositing process, even at this basic level, allows for flexibility from the get go. Where clients are concerned, flexibility is key. When passing work by a client it’s inevitable that changes will be requested and often they are something subtle that can be achieved in the composite. If you try to achieve that yourself using only 3d solutions, the render times will get long, especially when working on tv or film. Ordinarily I work alongside compositors and it’s up to them to do compositing tweaks whilst I work on a new shot or more substantial alterations to a current one.
Similarly, when first lighting a shot, working with many rendered channels, including additional ones of your own creation, is a rapid method of figuring out whether your setup is indeed heading in the right direction. Using the same component images for multiple looks is a time saver too.
One thing to bear in mind is once you know which channels are likely to be needed, it’s time to stop rendering the others as these can fill up hard drives quite nicely.
In short, stop tweaking your 3d scenes asap. Render out your initial lighting setup and see how much can be done in the comp. It isn’t cheating; It’s part of the process. It allows you to render the shot out, pass it on, and start a new one. Ultimately it will help your relationship with compositors who like to know what’s going into your image and what they need to add, plus [perhaps I shouldn’t say this, but here goes] it will make you more employable.
Recently in America, The History Channel broadcast The Bible Series, knocking American Idol into the weeds for ratings. The real reason of course to celebrate this fact is that I worked on VFX for this, along with many others hired by / working at Lola Post, London.
There were hundreds of shots. As the series covers many well-known events that are either epic in scale or miraculous in nature, it’s hard to cut corners with this kind of content.
One of the advantages of VFX is the ability to extend sets or create new ones. The most used model shared amongst the 3d crew was that of Jerusalem. It was originally an off-the-shelf-model of a real scale model, intended to be seen from a distance, so it needed to be tweaked and improved upon where appropriate on a shot by shot basis. With so many artists having touched the model at one point or other, the lighting setup, materials and textures got improved to the extent that once composited, the shots really shone out. Many of the shots I did for The Bible featured Jerusalem, either as an entirely CG set or an extension tracked into existing footage.
One story that is covered in the show is that of Moses parting The Red Sea, with the Israelites being chased by Egyptians through the parted waves. The shot I did for this sequence is a slightly top down shot, following the fleeing crowds through the freshly created gap in the ocean. To achieve this, I effectively split the 3d ocean into horizontal grids and vertical grids. The horizontal grids were simulated with aaOcean in Softimage. The vertical ones were distorted to represent the sea walls, textured with composited footage of waterfalls running upwards. The join where the two sets of grids met was blended using a matte and Nuke’s iDistort node. Softimage’s CrowdFX was used for the fleeing crowd. Twirling smoke elements were added once passed to the comp.
An advantage of Softimage’s ICE simulation system is that making a convincing cloud or mist is a fairly straight forward procedure. I was tasked with creating a storm over Jericho, a swirling mass of cloud and debris that had to look huge and imposing whilst looking down through the eye of the storm. With clouds, water, and many other fluids, scale can be half the battle. A large wave only looks large if surrounded by smaller ones, a cloud only looks like a huge ominous mass if seen as a collection of smaller masses, but go too small and the effect is lost entirely. In the case of the cloud, if too many small details were apparent it very quickly seemed fluffy. Cute a storm is not. Once the cloud’s scale was correct, there was the issue of it having to spin, distort and generally seem organic. Handily ICE has a node for rotating clouds around points in space so that solved that one. The distortion was shape animation applied to a lattice attached to the cloud.
The rest of my involvement on The Bible was tracking shots in PFTrack and adding in set extensions. Most of the 3d content was rendered using Solid Angle’s Arnold Renderer.
The work in the following reel is created using Softimage, Terragen, Nuke and PFTrack.
Text in the bottom right shows what I created for each shot.
See PDF for further details. Download PDF shot breakdown
Edited on 15th Oct – Now updated with work from The Bible Series and How To Build a Planet
Update! The CCTV-9 channel branding, including this ident, recently won a Gold for Best Channel Branding at the PromaxBDA awards in Singapore!
I was called back in to work at Lola in London for this Chinese TV channel ident for CCTV-9 Documentary. Only 2 of us worked on this shot: myself and Tim Zaccheo, head of 3D at Lola.
The ident sees a waterfall coming down the side of a cubic mountain. The camera pulls back down a valley with scenery akin to the Guilin area of China, then out into space to reveal that the Earth is indeed cubic. CCTV have a cubic theme, so this makes sense in context. Thanks to the real-world scale of Terragen and the existing workflow at Lola, Tim was able to come up with a camera move that once imported into Terragen matched perfectly with the Softimage scene. The Earth’s textures and even the clouds lined up perfectly in both sections allowing a seamless blend.
My part in this was embellishing the initially blocked out Terragen scene with the necessary details to make it look like the Guilin mountains. A challenge there was that Terragen is great for pointy Alpine style mountains dusted with snow. That is easy out of the box. Guilin mountains are almost bell jar in shape, carpeted in trees with rocky cliffs here and there. The valleys between have been eroded away by rivers, leaving behind relatively flat farming land.
The solution to this was a variety of painted map shaders. Although this allows flexibility and great detail when it comes to controlling displacements, they’re best replaced with actual textures if possible, else the rendering gets very intense. In this case it wasn’t really an option. The painted maps were used to define areas of low and high ground, plus to define where the river goes and to control where the farmland appeared.
As there is quite so much foliage in the area there needed to be a solution that didn’t rely entirely on populations of tree objects. In come the procedural trees. This is essentially a series of overlaid displacement textures that build up to create the cauliflower head look to the trees. Similarly, the farming land was achieved using a tiled texture of fields and a few trees distrbuted along hedgerows. It’s very easy in a procedural program like Terragen to forget that a bitmap texturing approach is still a valid method and often faster.
Something that took a while to figure out was the cubic mountain at the start. The cube was initially displaced using a square displacement map with a falloff around the edges, plus an area eroded away at the front. The stoney displacements were then layered on to this, taking the new normals into account, rather than throwing everything up vertically as is the default. It was then eroded in various directions using extra displacement maps.
The waterfall was Tim’s baby, done entirely in Softimage’s ICE using fairly straight forward techniques, but along with some coloured mattes it all came together nicely in the comp.
There’s no sound on the video above by the way. I’ll replace it with one with audio once I’ve located it.
That’s the shop, not the band, pop-pickers.
Recently I was called upon by Pretzel Films to aid them in the creation of an animation for the ladies clothing shop Oasis. We see a girl walking along changing clothes to suit her environment, the time of day and such, focussed on the idea that there is a pair of jeans for every occasion.
My input was the background images, drawn mostly by hand, then animated into the background based on a rough edit provided for me. The girl was not filmed against a green or blue screen, allowing the director, Jake Dypka a greater freedom when it came to lighting, however this did mean Jake ended up doing a lot of rotoscoping. Fortunately he was using the new rapid rotoscoping tools in After Effects CS5, which I’ve yet to look into. It was an enjoyable piece to work on, being something that provided enough creative leeway to not be restrictive.
Update: The film was viewable on Oasis-stores.com but is no longer part of their marketing. However, it is currently sitting on youtube apparently. http://bit.ly/a2ID0h
Last night, a new 3 parter started on BBC 4 for which I did the title sequence. It’s a tunnel of disembodied electric items roughly in order of when they came about or at least became popular. I put this together in a 3d composite in After Effects, made out of many many photographs, timed roughly to the music (Human League. Who could predict that?) Three versions of the sequence exist. Each is the same bar the ending which is themed for the 70s, 80s, and 90s respectively.
The show itself was interesting stuff. A technology obsessed family has their house converted to a 70s theme with no central heating, one bathroom and nary a modern gadget in sight. As the week goes on they are allowed such luxuries as a freezer in the kitchen, a colour TV (which promptly breaks), and a teasmade (yes that’s spelt correctly). Next week is the 80s, then the 90s the following week.
In my opinion this show works best as a study in family social behaviour rather than a trip down memory lane. The target audience of BBC 4 is old enough to remember all of it. Living in the 90s wasn’t that different technologically speaking to now so I’m interested to see how the family sticks together as they get closer and closer to the current decade.
Check it out on iplayer if you fancy and be sure to have a nose around the supporting website, made by Illumina, the same company I put together the title sequence for.
BBC iScience, which had already won the award for most interesting project I’d worked on, won the 2009 Royal Television Society Award for a television program for use in schools. I didn’t know this was up for an award so it’s a pleasant surprise! Here’s what RTS had to say:
“…a well-produced entry which stimulates, challenges and moves students to engage in both hard and soft science in a way that would definitely add value to the classroom experience.”
Presumably this Prof. Tanya Byron saying this as she hosted the night.
For a look at clips of the show, click here. I did all the cel-shaded animations, DNA mutations and anything involving little molecules flying about, colliding, causing pollution and so on.
I remember many of the science programs at school being old OU recordings on wonky VHS tape, played via ageing Ferguson Videostars. iScience trumps these on many levels, so the award is a well deserved accolade. I actually did all 3 sciences at school in GCSE and still learnt things producing work for this show.