Tag Archives: cgi

What is CGI? Why can’t filmmakers grasp how films are made?

My recent CGI Cola

CGI – Computer Generated Imagery, as a term has always been an enigma. Personally I see it as being 3D graphics, but Wikipedia confusingly refers to it as including some 2D also.

VFX – Visual Effects, to many is synonymous with green screen. I’ve long suspected this belief comes from Behind The Scenes documentaries, vacuous DVD fillers that are so popular I do wonder if many people prefer so-called BTS content to actual movies and TV shows. 

The VFX industry is so vast in scope that keying green screen (or any colour really) is one of dozens of things you could be asked to do within a week as a compositor. In itself, compositing is one of dozens of jobs in the business. However, very little compositing work is what many regard as CGI.

There! Right… there! You see it? That’s the grey area.  If a viewer of a cinematic spectacle sees a hint of VFX they may well jump to thinking of it as CGI. Not all VFX contains CGI. Am I splitting hairs because I do 3D CGI and see CGI as 3D only? Yes. Yes I am. 

When people say that show X has no CGI in, they might be right, or at least think they are. Lots of shows I work on have literally hundreds of VFX shots but only a dozen or so contain 3D graphic elements. The amount of VFX work in TV is astonishing. If you don’t notice it, it’s succeeded in being excellent.

To me, traditional 20th Century Hollywood was about in-camera practical effects and hand-painted backdrops. These days those are often, but not always, referred to as SFX – Special Effects. That historically has been used for so many things that now even VFX is lumped in with SFX in the media, to the extent awards are given out in the category of Special Visual Effects. Add in AI imagery and now nobody outside, or indeed inside, the VFX business has a clue what to do with all the acronyms.

The recent Barbenheimer furore made me think. Both Barbie and Oppenheimer contain a lot of VFX work – tonnes of it – but the directors’ favour of traditional methods was set upon by the media as a good thing, getting us all away from that pesky CGI. The CGI was never the issue. It was scriptwriting, acting, the terrible art direction, but most of all, a complete and utter misunderstanding of the whole VFX business and those who work within it.

To me, films and TV would improve a lot if the focus returned to making gripping stories with well-developed characters. Get that right, then speak to a VFX studio about what might work best as practical or VFX work. Read around the subject, talk to us VFX folk directly about what we’re doing, (and credit us if you would be so kind) but leave those misleading BTS docs alone. They aren’t made by those who made the effects.

To see the things I’ve worked on over the years and judge my qualifications for judginess, see Recent Work.

The Crown Season 5 at Rumble VFX – Period Set Extensions on Beautiful Plates

Before the late Elizabeth II passed and her son was coronated, I was a CG lead at Rumble VFX on Season 5 of The Crown for Netflix.

See the full breakdown of what Rumble did in the video below and on the Rumble site here The Crown, Season 5 – Rumble VFX:

For me, there was a lot of set extension work to do including a recreation of the famous 90s neon signs at Piccadilly Circus. Naturally, being The Crown, there were also ground level, rooftop and aerial shots of Windsor Castle. I created a dilapidated look for Villa Windsor (Mohamed Al Fayed’s gift to The Queen) and was even called upon to replace an errant non-royal yacht. (How dare the late Steve Jobs leave it in shot!)

Work on the show took lots of hours of research and meticulous attention to detail, creating 3D in Houdini, projections in Photoshop, painting up in Substance Painter, rendering in Redshift.

A challenge for me is that I really enjoy the show and wanted to work on it for years, so ended up treating each shot as if it was my last. At one point I was dreaming of various tones of wall in the shots of Windsor Castle. What helped immensely and stopped me painting myself in to a corner was the exceptional production team whose feedback and documentation of the shoots was on point.

The yacht was a peculiar beast. Yachts are often very smooth, white, shiny, looking like fresh CGI frankly. With this being an HDR project I had to make sure we had details that were matching the plate, even out of the range of the SDR monitors most of us work with daily. When doing my rough comps I knocked the exposure of everything down to check it matched, then brought it up again.

One aspect of this project that really helped is the mountain of photos out there on the web. I’m really grateful for those of you who visited Piccadilly in the 90s with a camera or indeed the millions who’ve documented Windsor and the show’s Windsor, Burghley House over the years!

Set work is just one string to my bow – see other projects here.

Preview – The Planets

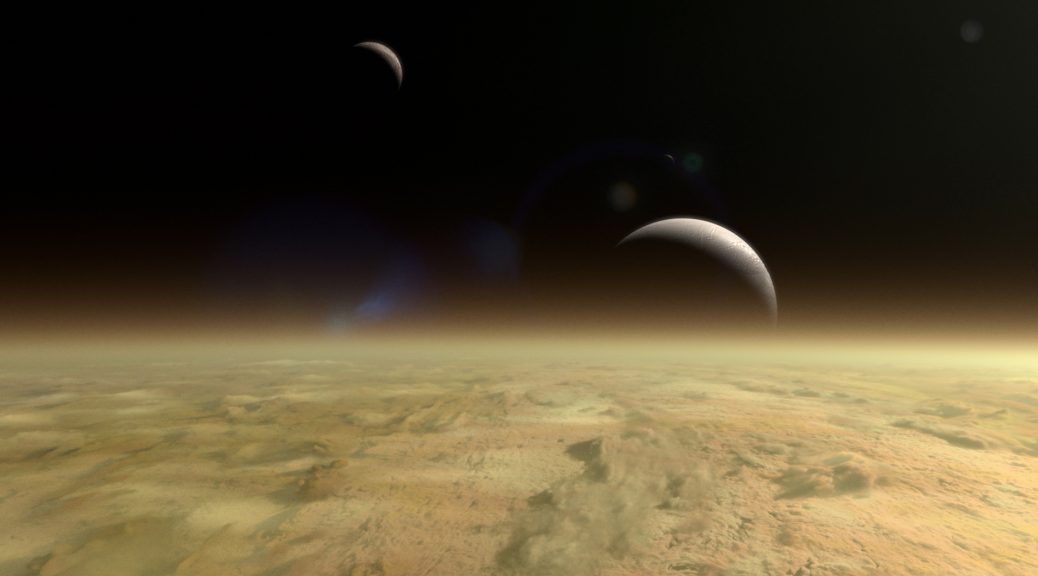
On my longest stint working for one client, 14 months at Lola Post, I was lucky enough to be working on The Planets, first airing on BBC 2 on Tuesday May 28th, a decade after the previous BBC show of the same title aired.

A lot has happened in the last ten years – scientific advances and space exploration has led to us having unprecedented imagery and data from our solar system which has altered the theories as to how Earth and its sisters came into being, why we have life and other planets currently don’t, inspiring future voyages into the unknown. Down here on our little blue marble, technology has marched on apace, supporting space exploration and indeed driving it, but it has another positive outcome too – a huge improvement in visual effects.

This series has hundreds of VFX shots in it, many of them involving visualising locations we can’t possibly send a film crew to and times so far in the past it’s hard to imagine. With so many shots, and so many different terrains and planetary destinations to represent, I was brought in early to do look development and some research into how things may appear. Once the series was underway this was supported by the Open University who informed of correct details and current theories regarding how a landscape looks, the colour of the sky, the variety of tones on the ground and so on.

Helping all this was the fact that NASA and ESA put a lot of their data out in to the public domain, so written information, photographs, global textures and even elevation data, are available to you and I for free. There’s a lot to wade through but it was well worth the trouble.

Much of my terrain work and planetary imagery was pieced together in Terragen, though some of the wider planet shots including contemporary Earth, Jupiter and Neptune, are made in Houdini, that also being the 3D software of choice for laying out camera moves, adding asteroids, dust clouds and so on. The probes, asteroids, meteors and landers were mostly tackled by a team of talented artists and operators, some being hired for their lighting skills, modelling, others for more challenging Houdini simulation and destruction work.

Many were working for several months, a few of us well over a year, with production itself taking 2 years in total! That’s a lot of people putting in a lot of effort, and if my recent viewing of an episode is anything to go by, it’s all been worthwile!

For more info, check out the BBC Earth site at https://www.bbcearth.com/theplanets

2017 Showreel

After many years of work I’ve finally built up enough new shots to replace much of my old reel. It served me well, bringing in many projects, and indeed some of the better shots still remain, but now with spangly new work alongside!

My contribution to each shot is shown briefly in the bottom left of the screen, with a much more detailed explanation written shot by shot in the PDF breakdown.

In the past few years I’ve been fortunate enough to work on some very interesting projects that have been subject to watertight NDAs. Now that they’ve been broadcast and the dust has settled, it’s a real bonus for me to finally be able to share some of these with you.

The MARS series and Teletubbies were two such projects. MARS was seven months of my time and if I recall correctly, Teletubbies was significantly longer. This left two large projects missing from my reel and consequently any updates to it felt kinda pointless as I’d only be adding one or two shots and labelling it a new reel. The thing with working in TV or film is not all shots that I work on are actually showreel-worthy. Many are similar to each other or shots I’ve made previously, or they may be created using other people’s systems, to the point that putting them in a reel of my own work feels disingenuous.

This reel has been a long time coming, so I hope you enjoy it!

Britain’s Most Extreme Weather and How The Universe Works

This past few months I’ve been beavering away at Lola Post on 2 series of shows, creating VFX of a weathery, Earth-scale nature for Britains’ Most Extreme Weather, and shots of all scales for series 3 of How The Universe Works.

Ordinarily I’d put together blog posts before a show goes to air, but in the case of Britain’s Most Extreme Weather it slipped from my mind as soon as I rocked back onto How The Universe Works. Much of my weathery input was particle systems and strands, either using existing setups from previous shows or creating new ones as appropriate. A particular favourite of mine was a system showing the movement of air around cyclones and anticyclones; A strand system that rotates particles around many points, allowing them to move fluidly from one direction to another as if air, all wrapped around a lovely spherical Earth.

How The Universe Works is a series I’ve been on for many many months now. I first started on it in November I think. The first episode, all about our Sun, is to be shown on 10th July on Science in the USA.
For that show I took Lola’s existing Sun cutaway setup, introducing a more boiling lava-like feel through judicious use of animated fractals and grads.
Overall I’ve worked on 8 episodes with a handful of shots in each show. After all that dedication to spheres in space I am now supervising the VFX on one of the last shows for this series!

More geeky details and videos for both shows to come!

Richard Hammond Builds a Planet – UK Airing

The first episode of the British cut of How to Build a Planet is to be shown this weekend at 9pm GMT on BBC One.

Information on what I did on the show is in my previous blog post.

The British cut is different to the US one. The cut shown on Sci had to be edited to allow for the ad breaks. So, if you like your Hammond unsullied, this is the showing for you! Additionally, this being the UK, Hammond appears in the title of his own show. The international cuts often drop his name so as to make them more marketable in countries where he is little known.

The second episode is likely to be broadcast a week or so later but is yet to be confirmed I think.

More info at the at the BBC

How To Build A Planet – My VFX Input

Not so long ago I worked at Lola Post, London, on another documentary hosted by Richard Hammond. Similar to the Journey to The Centre of The Planet and Bottom of The Ocean shows I worked on some time back, this entailed a heck of a lot of vfx.

The concept is that we see the constituent parts of scaled-down planets and the solar system being brought together in a large space over the Nevada desert. In order for Hammond to be able to present things at the necessary altitude, he is up at the top of a 2 mile high tower, which is obviously not real for various reasons. Nor is the desert much of the time. Or Hammond.

My input on the show was working on dust and sand particle systems. I was working on 2 sequences of shots. I will warn you now that some of this will get technical.

The first sequence shows a large swirling cloud of high-silica sand and iron. This includes a shot which was to become my baby for a month or two. It pulls out from Hammond at the top of the tower, back through the dust cloud swirling around him, then really far back so we see the entire 2km wide cloud in the context of the landscape around it. The whole shot is 30 seconds long.

The second sequence of shots shows the formation of Jupiter out of a large swirling disc of matter. Jupiter itself attracts dust inwards, which swirls as it approaches.

A few challenges presented themselves quite early on. One was creating particle systems in Softimage’s ICE that behaved correctly, especially when it came to dust orbiting Jupiter as the whole system itself swirls around the protosun. The initial swirling round the protosun was solved using a handy ICE compound that Lola have kicking about on their server, but if you use that twice in an ICE tree it is only evaluated once as it sets the velocity using an execute node, effectively overriding the new velocity value for each particle, rather than passing that out so it can be added to the previous velocity.

The solution to this was to break apart the compound. Integrating new nodes, including some out of a Move Towards Goal node, meant that I was able to make a new compound that I could proudly label Swirl Towards Goal. It sets the goal, then outputs a velocity which can be added to the velocity from the previous swirling compound higher up the tree. It even has sliders for distance falloff, swirl speed, and weight.

The most challenging aspect of this project was actually rendering. The swirling dust in each of my shots is made up of about 4 different clouds of particles. One alone has 60 million particles in it.

Enter Exocortex Fury, the fabled point renderer that was to save our bacon. Aside from one fluffy cloud pass per shot, rendered as a simple Mental Ray job on a separate lower detail cache, each cloud pass was rendered with Fury. Unlike traditional particle renderers that use CPU to render, Fury is a point renderer which can take advantage of the raw power of graphics cards. The upside is a far faster render compared to traditional methods, and done correctly it is beautiful. To speed things up further, particles which were offscreen were deleted so Fury wouldn’t consider them at all. Downsides are that it can flicker or buzz if you get the particle replication settings wrong and it has no verbose output to tell you quite how far it is through rendering. Between us dust monkeys many hours were spent waiting for Fury to do something or crash.

Adding to the complications was the scale of the main scene itself. The tower is rendered in Arnold, a renderer that works best when using one Softimage unit per metre. Unfortunately the huge scene scale caused problems elsewhere. In a couple of shots the camera is so high off the ground that mathematical rounding errors were causing the translation to wobble. Also, as particles, especially Fury-rendered ones, prefer to be in a small scene to a gigantic scene for similar mathematical reasons, they weren’t rendering correctly, if at all. The particles were in their own scenes for loading speed and memory overhead purposes, but in order to fix these issues, the whole system was 1/5 of the main scene scale and offset in such a way that it was closer to the scene origin yet would composite on top of the tower renders perfectly.

How to Build a Planet is on show in the US on Discovery’s Science channel before being shown to the UK in November.
Discovery Sci – How to Build a Planet

Why you need compositing in your 3d life

Recently I’ve been retraining in Maya and giving myself extra alone time with the Arnold renderer from Solid Angle.
I decided to use this as not only an opportunity to find out how my Softimage lighting and rendering skills translate to Maya, but to show how basic compositing is something that every 3d artist should embrace if they don’t already.

One thing which has surprised me again and again is how little students and graduates of 3d courses are given a grounding in understanding what goes into their image and why it’s beneficial to use the compositing process as part of their workflow. Some students are even penalised for not showing their raw unenhanced render, having points deducted for daring to composite. To give a parallel, this to me is like a film photography student handing in negatives and no prints. The job is half done.

This won’t be a tutorial, more a pointer in the right direction for those who are starting out.
The example I use, a still life of a bowl of fruit, is a model from the very first lighting challenge hosted over at CGTalk. The files and others are downloadable at 3dRender. The model’s pretty old now so it’s not especially high detail but is still sufficient to show you what I intend to.

After a bit of setup in Maya and throwing on some pretty rough textures, here’s the beauty straight out of Arnold:

Beauty renderer

It’s lit with 3 lights; A cool exterior light, a warmer interior light, and a fill for the shadow in the middle. On their own, the images appear like this:

Lights Contact Sheet

These images can be added together in any compositing software and they will give exactly the same result as the beauty above, to the extent that a pixel on the beauty will be exactly the same colour as when these three images are added together.

Each of these images is itself a composite image. Arnold, Mental Ray, Vray and other renderers consider many different material properties when returning the final colour for a particular pixel. Each property can be saved out as an image itself and added together to form the final image. In the case of the beauty itself, these are the images that I’ve rendered out of Arnold:

Component Images

Again, added together, these form the same image as the beauty above perfectly.

(A side note here: A few component images are missing, including reflections, but were missed out of this contact sheet as they are entirely black. As none of the materials are reflective in the traditional sense, the reflection image is returned as black, whereas the direct specular contains highlights that mimic reflections. Arnold is peculiar in that it can consider reflections in 2 ways and transparency in 2 ways, depending on what is trying to be achieved.)
 

So what am I getting at here?

Here’s the beauty again:

Beauty renderer

Now here is a warm, evening setup:

Evening

And finally, a night lighting setup:

Night

All three use the same component images, composited together in different ways: For example, tinting the lights, changing the intensity by blending the images with varying opacity, or even desaturating the key light to achieve a moonlit interior effect. On the night lighting I’ve changed the apple using a matte together with the specular & sss channels from the fill light. It was too bright and waxy. I could have re-rendered the 3d perhaps, but a tweak in Nuke was a lot more efficient.

The compositing process, even at this basic level, allows for flexibility from the get go. Where clients are concerned, flexibility is key. When passing work by a client it’s inevitable that changes will be requested and often they are something subtle that can be achieved in the composite. If you try to achieve that yourself using only 3d solutions, the render times will get long, especially when working on tv or film. Ordinarily I work alongside compositors and it’s up to them to do compositing tweaks whilst I work on a new shot or more substantial alterations to a current one.

Similarly, when first lighting a shot, working with many rendered channels, including additional ones of your own creation, is a rapid method of figuring out whether your setup is indeed heading in the right direction. Using the same component images for multiple looks is a time saver too.

One thing to bear in mind is once you know which channels are likely to be needed, it’s time to stop rendering the others as these can fill up hard drives quite nicely.

In short, stop tweaking your 3d scenes asap. Render out your initial lighting setup and see how much can be done in the comp. It isn’t cheating; It’s part of the process. It allows you to render the shot out, pass it on, and start a new one. Ultimately it will help your relationship with compositors who like to know what’s going into your image and what they need to add, plus [perhaps I shouldn’t say this, but here goes] it will make you more employable.

South Bank Show Trailer

A few months back I worked on a trailer for the South Bank Show, featuring Melvyn Bragg walking through the Leake St tunnel under Waterloo station. Bragg was shot on a greenscreen, with the environment being recreated in Softimage by myself and fellow freelancer Rasik Gorecha.

The obvious question there is why? Why can’t Mr. Bragg just go into the tunnel and we shoot it there, huh? Well, there are a few obvious answers to that. The tunnel, itself a road with access to a car wash half way down, is dank, contains certain undesirable types Mr. Bragg would probably best steer clear of, and is continually in flux thanks to it being one of the few areas in London where it is legal to graffiti. It’s also not the most comfortable of places to sit around in for long hours on a shoot. The other reason is that lots of the graffiti was to be replaced with animated posters and artwork featuring well known faces from the arts. That process is a lot easier if created digitally and lit using indirect lighting solutions.

My input on this was twofold. Firstly I set up the lighting in Arnold. After an hour or so of experimenting, the solution found was to place shadow casting point lights in the ceiling under about half of the strip light fittings, plus a spot light at either end of the tunnel. Additional fill lights were used to brighten up the nearest walls. The lights in the walls toward the back of the tunnel are merely textured models and not actual lights.

One of the things with a Global Illumination solution like Arnold is that it can lead to fizzing. One solution to lighting this tunnel would be area lights. This was ditched as a plan extraordinarily fast as it led to lots of noise, plus the modelled lights themselves act as bounce cards essentially negating the need for area lights at all.

Rasik had the majority of the modelling done by the time I joined in the project but was yet to embark on cables. Whilst he set up initial texturing, I became cable monkey. I modelled cables and brackets, trays for them to run along, pipes and all sorts. It took a few days of continually modelling cables before I’d finished them. Simple stuff but it really added to the believability.

South Bank Show Trailer

The top of the two images above is the model with finished textures and below that is the finished lighting.

The final trailer is not as it appeared on Sky for 2 reasons. They added their own logo at the end, naturally enough, and they own full copyright of the sound bizarrely, so mine’s a silent movie. Add your own ragtime soundtrack as appropriate.

The Bible Series – VFX

Recently in America, The History Channel broadcast The Bible Series, knocking American Idol into the weeds for ratings. The real reason of course to celebrate this fact is that I worked on VFX for this, along with many others hired by / working at Lola Post, London.

There were hundreds of shots. As the series covers many well-known events that are either epic in scale or miraculous in nature, it’s hard to cut corners with this kind of content.

One of the advantages of VFX is the ability to extend sets or create new ones. The most used model shared amongst the 3d crew was that of Jerusalem. It was originally an off-the-shelf-model of a real scale model, intended to be seen from a distance, so it needed to be tweaked and improved upon where appropriate on a shot by shot basis. With so many artists having touched the model at one point or other, the lighting setup, materials and textures got improved to the extent that once composited, the shots really shone out. Many of the shots I did for The Bible featured Jerusalem, either as an entirely CG set or an extension tracked into existing footage.

One story that is covered in the show is that of Moses parting The Red Sea, with the Israelites being chased by Egyptians through the parted waves. The shot I did for this sequence is a slightly top down shot, following the fleeing crowds through the freshly created gap in the ocean. To achieve this, I effectively split the 3d ocean into horizontal grids and vertical grids. The horizontal grids were simulated with aaOcean in Softimage. The vertical ones were distorted to represent the sea walls, textured with composited footage of waterfalls running upwards. The join where the two sets of grids met was blended using a matte and Nuke’s iDistort node. Softimage’s CrowdFX was used for the fleeing crowd. Twirling smoke elements were added once passed to the comp.

An advantage of Softimage’s ICE simulation system is that making a convincing cloud or mist is a fairly straight forward procedure. I was tasked with creating a storm over Jericho, a swirling mass of cloud and debris that had to look huge and imposing whilst looking down through the eye of the storm.
With clouds, water, and many other fluids, scale can be half the battle. A large wave only looks large if surrounded by smaller ones, a cloud only looks like a huge ominous mass if seen as a collection of smaller masses, but go too small and the effect is lost entirely. In the case of the cloud, if too many small details were apparent it very quickly seemed fluffy. Cute a storm is not. Once the cloud’s scale was correct, there was the issue of it having to spin, distort and generally seem organic. Handily ICE has a node for rotating clouds around points in space so that solved that one. The distortion was shape animation applied to a lattice attached to the cloud.

The rest of my involvement on The Bible was tracking shots in PFTrack and adding in set extensions. Most of the 3d content was rendered using Solid Angle’s Arnold Renderer.

The shots I mention above, along with a few others, are now online in my updated 2013 reel.

For further details on VFX in The Bible, check out FXGuide’s feature on Lola’s work.