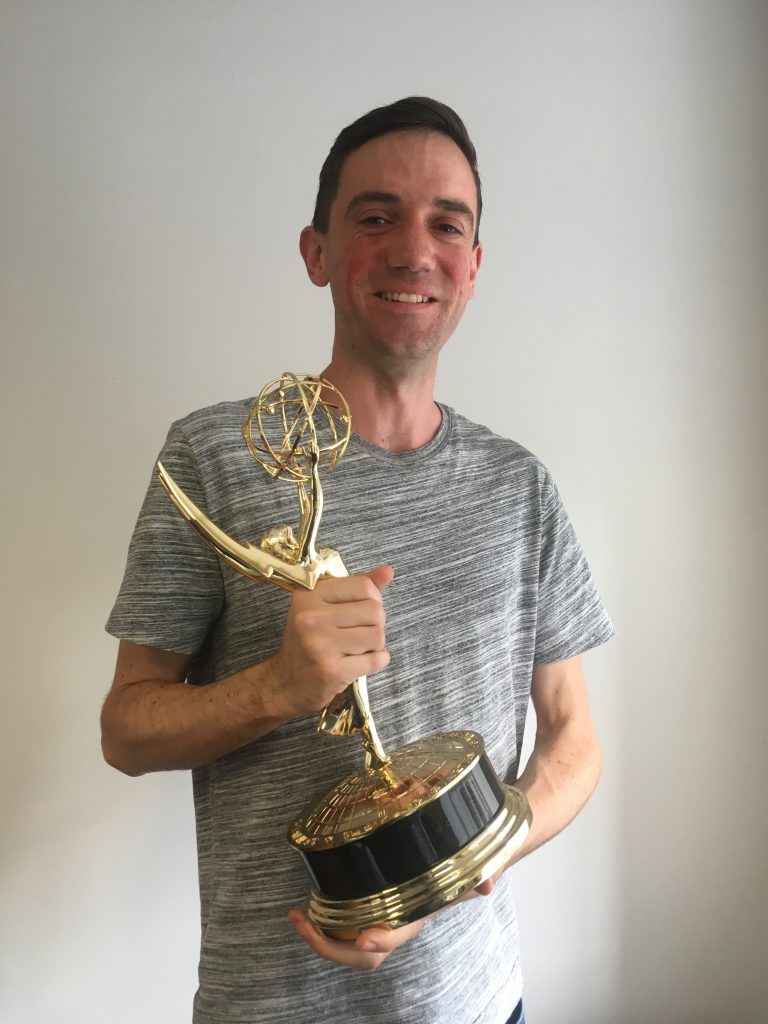
It’s not often I find the time to write something for my blogs these days. Even this news is 2 months old at time of writing. Back in September, the first episode of The Alienist, a show I spent many months doing modelling and texturing work on at Peerless, won the 2018 Emmy for Outstanding Special Visual Effects in a Supporting Role!
Needless to say it has gone on the CV. My colleague and good friend Rasik hopped over to LA (bravely I might add) and picked up this little lady for us. Here I am holding what has to be the most obvious hiding-in-plain-sight potential murder weapon I’ve ever held. Those lightning wings are spiky. There’s a sentence I never thought I’d write. Anyway! Onwards and upwards!
Me with a shiny award. No I don’t get to keep it. Stay outta my home! 😛
The Alienist is now available on Netflix in the UK.
After many years of work I’ve finally built up enough new shots to replace much of my old reel. It served me well, bringing in many projects, and indeed some of the better shots still remain, but now with spangly new work alongside!
My contribution to each shot is shown briefly in the bottom left of the screen, with a much more detailed explanation written shot by shot in the PDF breakdown.
In the past few years I’ve been fortunate enough to work on some very interesting projects that have been subject to watertight NDAs. Now that they’ve been broadcast and the dust has settled, it’s a real bonus for me to finally be able to share some of these with you.
The MARS series and Teletubbies were two such projects. MARS was seven months of my time and if I recall correctly, Teletubbies was significantly longer. This left two large projects missing from my reel and consequently any updates to it felt kinda pointless as I’d only be adding one or two shots and labelling it a new reel. The thing with working in TV or film is not all shots that I work on are actually showreel-worthy. Many are similar to each other or shots I’ve made previously, or they may be created using other people’s systems, to the point that putting them in a reel of my own work feels disingenuous.
This reel has been a long time coming, so I hope you enjoy it!
When I am asked what I do for a living, there is a follow-up question that is so common I begin to answer it right away now. That question is, “Ok, that sounds interesting. So what do you actually do? What is Visual Effects really?”
It’s a fair question actually and one whose answer changes as time goes on. If I’m stumped for an answer to the question, I try some of the following.
My staple answer now is,
“I add stuff to video footage that wasn’t there in the first place, or take it away if it wasn’t meant to be there.”
More often than not, the actual answer is,
“I create something with the appearance of having been shot as real life, but which is actually impossible to shoot, be that for practical, artistic or financial reasons.”
Ah, so that will answer it, right? Nope. I find these answers are enough for most people to understand at least vaguely what the end result of my job is. However, some are mad about film, TV dramas and whatnot and really want to show their interest. Again, fair enough. A question you might get is,
“So when you say you add things into video footage or film or whatever, how do you do that?”
That’s the really tricky one to answer, especially as everyone’s preconceptions of media, especially digital, are different. There’s the Make Awesome button right? It’s all done by the computer right?
However, wonderfully, a lot of people use Photoshop now and kind of get the concept of layering things over each other. Lately, I’ve been explaining with,
“VFX has similar principles to editing photographs, only these photos are on the move. Imagine using Photoshop for moving images, with all the layers and masks moving, the colour corrections animating and so on. I make elements, series of 2D images, that are composited on top of others, like layers are in Photoshop.”
I do almost exclusively 3D VFX, by which I mean those elements are created in a 3D package, such as Maya, rendered out as 2D images, just like photographs have no physical depth to them. I no longer get bogged down into details when explaining VFX. To begin with, I don’t even mention the many jobs available; compositor, modeller, 3D generalist, render wrangler etc. I used to say I did 3D animation, but that would lead people down the path of thinking I did Toy Story or was about to reinvent Wallace and Gromit. Another danger with the 3D moniker is the recent resurgence in 3D cinema which is another kettle of fish altogether.
So there we are. A fairly basic answer which most people understand! Incidentally, I am a 3D generalist, available to hire in London, UK. Check out my work on the home page at https://www.ajcgi.co.uk.
From the start of May onwards I will be available for generalist 3d VFX work in London, UK.
My show reel and examples of work are on the home page at https://www.ajcgi.co.uk
I’ve been beavering away this year at a huge rate of knots, working on such things as adverts including one for BBC World Service, and documentaries for BBC and Channel 4. Videos and suchlike to come.
I have now have 8 years of producing shots across many media and platforms, mainly for dramas and documentaries.
More details on my PDF CV at https://www.ajcgi.co.uk/blog/?page_id=45
Recently I’ve been retraining in Maya and giving myself extra alone time with the Arnold renderer from Solid Angle.
I decided to use this as not only an opportunity to find out how my Softimage lighting and rendering skills translate to Maya, but to show how basic compositing is something that every 3d artist should embrace if they don’t already.
One thing which has surprised me again and again is how little students and graduates of 3d courses are given a grounding in understanding what goes into their image and why it’s beneficial to use the compositing process as part of their workflow. Some students are even penalised for not showing their raw unenhanced render, having points deducted for daring to composite. To give a parallel, this to me is like a film photography student handing in negatives and no prints. The job is half done.
This won’t be a tutorial, more a pointer in the right direction for those who are starting out.
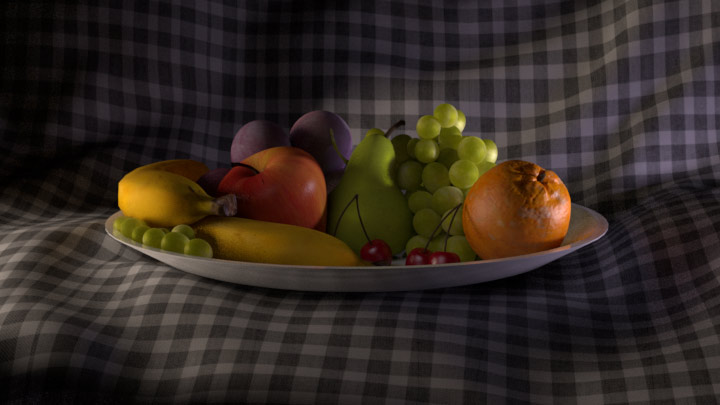
The example I use, a still life of a bowl of fruit, is a model from the very first lighting challenge hosted over at CGTalk. The files and others are downloadable at 3dRender. The model’s pretty old now so it’s not especially high detail but is still sufficient to show you what I intend to.
After a bit of setup in Maya and throwing on some pretty rough textures, here’s the beauty straight out of Arnold:
It’s lit with 3 lights; A cool exterior light, a warmer interior light, and a fill for the shadow in the middle. On their own, the images appear like this:
These images can be added together in any compositing software and they will give exactly the same result as the beauty above, to the extent that a pixel on the beauty will be exactly the same colour as when these three images are added together.
Each of these images is itself a composite image. Arnold, Mental Ray, Vray and other renderers consider many different material properties when returning the final colour for a particular pixel. Each property can be saved out as an image itself and added together to form the final image. In the case of the beauty itself, these are the images that I’ve rendered out of Arnold:
Again, added together, these form the same image as the beauty above perfectly.
(A side note here: A few component images are missing, including reflections, but were missed out of this contact sheet as they are entirely black. As none of the materials are reflective in the traditional sense, the reflection image is returned as black, whereas the direct specular contains highlights that mimic reflections. Arnold is peculiar in that it can consider reflections in 2 ways and transparency in 2 ways, depending on what is trying to be achieved.)
So what am I getting at here?
Here’s the beauty again:
Now here is a warm, evening setup:
And finally, a night lighting setup:
All three use the same component images, composited together in different ways: For example, tinting the lights, changing the intensity by blending the images with varying opacity, or even desaturating the key light to achieve a moonlit interior effect. On the night lighting I’ve changed the apple using a matte together with the specular & sss channels from the fill light. It was too bright and waxy. I could have re-rendered the 3d perhaps, but a tweak in Nuke was a lot more efficient.
The compositing process, even at this basic level, allows for flexibility from the get go. Where clients are concerned, flexibility is key. When passing work by a client it’s inevitable that changes will be requested and often they are something subtle that can be achieved in the composite. If you try to achieve that yourself using only 3d solutions, the render times will get long, especially when working on tv or film. Ordinarily I work alongside compositors and it’s up to them to do compositing tweaks whilst I work on a new shot or more substantial alterations to a current one.
Similarly, when first lighting a shot, working with many rendered channels, including additional ones of your own creation, is a rapid method of figuring out whether your setup is indeed heading in the right direction. Using the same component images for multiple looks is a time saver too.
One thing to bear in mind is once you know which channels are likely to be needed, it’s time to stop rendering the others as these can fill up hard drives quite nicely.
In short, stop tweaking your 3d scenes asap. Render out your initial lighting setup and see how much can be done in the comp. It isn’t cheating; It’s part of the process. It allows you to render the shot out, pass it on, and start a new one. Ultimately it will help your relationship with compositors who like to know what’s going into your image and what they need to add, plus [perhaps I shouldn’t say this, but here goes] it will make you more employable.
A few months back I worked on a trailer for the South Bank Show, featuring Melvyn Bragg walking through the Leake St tunnel under Waterloo station. Bragg was shot on a greenscreen, with the environment being recreated in Softimage by myself and fellow freelancer Rasik Gorecha.
The obvious question there is why? Why can’t Mr. Bragg just go into the tunnel and we shoot it there, huh? Well, there are a few obvious answers to that. The tunnel, itself a road with access to a car wash half way down, is dank, contains certain undesirable types Mr. Bragg would probably best steer clear of, and is continually in flux thanks to it being one of the few areas in London where it is legal to graffiti. It’s also not the most comfortable of places to sit around in for long hours on a shoot. The other reason is that lots of the graffiti was to be replaced with animated posters and artwork featuring well known faces from the arts. That process is a lot easier if created digitally and lit using indirect lighting solutions.
My input on this was twofold. Firstly I set up the lighting in Arnold. After an hour or so of experimenting, the solution found was to place shadow casting point lights in the ceiling under about half of the strip light fittings, plus a spot light at either end of the tunnel. Additional fill lights were used to brighten up the nearest walls. The lights in the walls toward the back of the tunnel are merely textured models and not actual lights.
One of the things with a Global Illumination solution like Arnold is that it can lead to fizzing. One solution to lighting this tunnel would be area lights. This was ditched as a plan extraordinarily fast as it led to lots of noise, plus the modelled lights themselves act as bounce cards essentially negating the need for area lights at all.
Rasik had the majority of the modelling done by the time I joined in the project but was yet to embark on cables. Whilst he set up initial texturing, I became cable monkey. I modelled cables and brackets, trays for them to run along, pipes and all sorts. It took a few days of continually modelling cables before I’d finished them. Simple stuff but it really added to the believability.
The top of the two images above is the model with finished textures and below that is the finished lighting.
The final trailer is not as it appeared on Sky for 2 reasons. They added their own logo at the end, naturally enough, and they own full copyright of the sound bizarrely, so mine’s a silent movie. Add your own ragtime soundtrack as appropriate.
The work in the following reel is created using Softimage, Terragen, Nuke and PFTrack.
Text in the bottom right shows what I created for each shot.
See PDF for further details. Download PDF shot breakdown
Edited on 15th Oct – Now updated with work from The Bible Series and How To Build a Planet